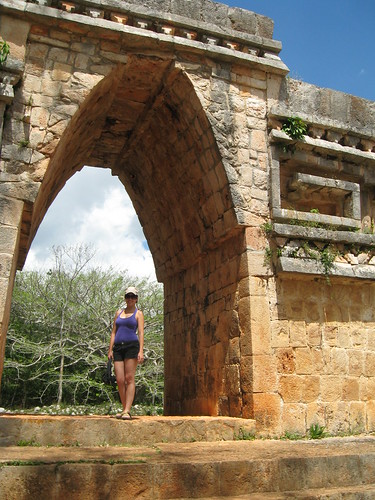
Search This Blog

Saturday, April 30, 2011

Recipe: Savory Mango Soup


Had a tough time with this pic. It looked even better in real life!

I know it's been a while, so I am going to reward your patience with an original recipe. How about that? Enjoy!

Ok, I am sure that someone somewhere makes something like this soup, but I have honestly never had it or heard of it. I am going to consider it a personal creation for now. I was literally struck by inspiration one day, and the final product was so delicious, I made it again and am now sharing the recipe with you. As far as soups go, this one is really easy and doesn´t take long to make (as little as 45 minutes if you don´t simmer it too long). Prep time is super fast, probably 5-10 minutes depending on how fast you work a knife. You´ll need a blender (stick blender is convenient but an upright blender works too) and a mesh strainer. We have a big one that cost $2, and it´s perfect for soups.

If you are averse to mango because of it´s texture (like Maru), don’t worry! This soup will leave you with nothing but the delicious tart, tangy, and slightly sweet flavor of a ripening mango. It also feels great on the throat. I think it would be really nice for someone with a sore throat.

While the soup isn’t hard to make, the color is gorgeous, and it could easily be part of an elegant dinner. It´s pretty light, which makes it good to accompany other light, summer fare like veggie dishes, fish, or chicken. But that’s all just suggestion. Do what you will!

Also, I haven´t tried it yet, but I bet this same recipe would work well with tart peaches. I’ll have to try that and get back to you.

About mangoes


These are the mangoes you want.

Mangoes are all over the place in the markets in Mexico right now. The big red, yellow, and green ones are the best for this recipe in my opinion. They are tarter than the little yellow mangos, which makes them great for savory dishes. Plus, for those of you in colder climes (I´m looking at you Michigan people), they are much easier to find. You want to use them for soup when they are still pretty hard, not exactly green, but not exactly ripe and sweet. The fruit should yield slightly when you squeeze it.

Here is a really easy way to clean any mango whether you want to use it for a recipe like this or just eat it:

1. Rinse the fruit under cold water.

2. Stand it up on its end and with a sharp knife, cut just along the large pit (about a ¼ inch off center). Repeat for the other side. Your knife should scrape along the pit as you go so that you get as much fruit off as possible.

3. Using a spoon, scoop the fruit out of its peel in one, large piece.

4. Chop or slice as desired.

5. Remove the peel from around the pit. Cut off any excess fruit or just nibble on it (be ready to floss afterwards!)


Savory Mango Soup

1 Tablespoon veggie oil

1 small onion, chopped

1 carrot, chopped

2-3 cloves garlic, minced

1 Tablespoon ginger, minced

1 roma tomato, chopped

2 large mangos, cleaned and chopped. Reserve the pits. (Best if not quite ripe. See instructions above.)

2 dried chiles de arbol whole, with seeds removed (Any other smooth skin dried chile will work too. You can skip the chile, but it adds a really nice flavor, and if you remove it before blending, you probably won´t even notice the spice.)

½ inch piece of cinnamon, whole

6-8 cups veggie stock, heated (calculate about 1 ½ cups of stock per serving)

1 avocado, chopped

¼ cup chopped fresh parsley

Salt and pepper to taste

Heat the oil in a large pot over medium eat. Add the onion and carrot with a sprinkle of salt. Sautee until the vegetables are beginning to soften, about 5 minutes.

Add the garlic and ginger and sautee until very fragrant, about 2 minutes. Add the tomato and cook for another 5 minutes. (If you have a little white wine on hand, this would be a good time to throw in a ¼ cup or so. Cook until the liquid is almost completely evaporated.)

Add the chiles, cinnamon, and mango. Add another pinch of salt. Stir and cook for about a minute, then pour in the stock. Add the pits to the pot (without the peels!). As they simmer, that extra fruit and juice clinging to them will add its flavor to the soup.

Bring the soup to a boil then lower the heat to a simmer. Cook for at least 20 minutes, preferably about 40 so that the flavors can come together.

Remove the mango pits and the cinnamon stick. If you are concerned about your soup being too spicy, you can also take out the chiles. If you want it to have a little kick, leave them in there.

Using a stick blender or in a regular blender in batches, puree the soup. Taste and adjust seasonings. Pour the soup through a medium mesh strainer. This filtering will remove a fair amount of roughage and leave you with a wonderfully silky soup. Adjust the seasonings on the strained soup one last time, and get ready to serve!

To serve, divide the chopped avocado among six soup bowls. Ladle in the soup, then sprinkle with chopped parsley. Serve immediately.

Wednesday, April 13, 2011

Recipe: Enfrijoladas

I plan on adding more basic recipes (rice is on its way, just needs a little testing), but for now, let´s start looking at ways to use what I just posted on Monday and Tuesday. I also promise to take some pictures soon. I just haven´t made some of this stuff recently. As soon as I take them, I will add them to the posts. After all, you eat with your eyes first! For now...

Now that you know how to make beans, here is a staple of our household. Enfrijoladas (En-free-hoe-lah-dahs) are common all over Mexico. Usually in restaurants, the tortillas are filled with shredded chicken, and the beans are turned into a thick sauce, sometimes with a little aniseed added in. It´s really good that way, but this version is a Bautista (Maru´s family) breakfast, lunch, or dinner special. It´s quick (with the beans already made, it will be ready in about 10 minutes), versatile (you can change the filling to suit your taste, and you can top it with whatever veggies you might have on hand), cheap, and hearty. Two tortillas is usually good for both Maru and me (I usually put more beans on my plate). If you´re a big eater, you could do three or even four. Whatever floats your boat, as they say.

Enfrijoladas (Vegetarian)

(Ingredients listed are for two servings. Increase or decrease at your leisure.)

4 tortillas (corn or flour, your preference)

1 beaten egg

2 cups prepared beans with their broth, heated piping hot

Salt to taste

1 Tablespoon veggie oil (you´ll probably need less than this)

Optional toppings:

  • Diced or shredded cheese (any mild melting cheese is good)
  • Diced tomatoes
  • Sour cream or yogurt
  • Hot sauce or homemade salsa
  • Chopped cilantro
  • Sliced avocado

Heat about a teaspoon of the oil over medium-high heat in a frying pan. Once the oil is hot, begin lightly frying the tortillas one by one for about twenty seconds on each side. They should still be pliable, you´re not making tostadas. Add more oil as needed. (If you want to skip the oil and go for a lower fat version, you can. Just heat up the tortillas until they are soft. The difference is that they will fall apart more once you finish the dish. Frying them gives them a little more body.) Set the fried tortillas aside.

Add a pinch of salt to the egg, and then pour it into the pan and cook yourself a scrambled egg. Divide it into four equal portions. Use the portions to make rolled tacos with your tortillas. Place two tacos in a dish (a large soup bowl works great). Pour about a cup of beans with broth over the tacos. Salt to taste, add desired toppings, and enjoy!

If you want to use cheese, I recommend putting it on top of the tacos before pouring on the beans so that the heat from the beans will melt it.

Tuesday, April 12, 2011

Recipe: Mexican Beans

Frijoles negros

Beans, beans the magical fruit. Many people have written about the health benefits of this near perfect food (fiber, protein, iron, oh my!), so I won´t go into it. Needless to say, you should eat beans! And not out of the can. It is so easy to make your own. With a pressure cooker, you don´t even really need to plan, no soaking or anything. And you need very few ingredients. If you have dried beans in your pantry, you always have a delicious and nutritious meal on hand, and they´re cheap! Probably the biggest bang for your buck in terms of nutrition and filling you up.

You will have to make them a few times in order to perfect the texture but that doesn´t mean your beans won´t be tasty, they just won´t be perfect J (I´m pretty sure that takes a while. I´m still working on it).

Here in Mexico, they say a house is not a home if there are no beans. In Puebla, black beans are the most common (and they are often referred to as frijoles Michigan!), but if you go to the market, you´ll be dazed by the different colors and sizes.

This recipe is of my own creation, incorporating some tips that Maru´s grandmothers have given me as well as some tricks we´ve developed on our own. One classic mistake you do not want to make is over-seasoning. Notice that besides the beans, even if you add in all the optional ingredients, it´s just onions, chile, epazote, and salt. No garlic, no cumin, no pepper, nothing. And if you just want to use onions and salt, your beans will be yummy. The things are bursting with flavor all on their own.

Also, if you are concerned about gas from beans, you can always use Bean-o, but in reality, if beans and other legumes (like lentils) are a regular part of your diet, you won´t notice any discomfort or excess gas, because your body will be used to processing them. So don´t worry about taking them to work for lunch!

Basic Beans (vegan depending on fat or stock used)

2 cups dried beans (black, pinto, whatever your preference)

1 medium white onion, halved

1 sprig fresh epazote (optional)

4-6 cups water

2 Tablespoons vegetable oil (lard is good here too)

1-2 whole dried chiles (optional. Remove the stem and seeds. Pasilla, guajillo or chile de arbol are good.)

Salt to taste

1-2 cups chicken, veggie, or pork stock (optional)

First, you need to get those dried beans cooked. There are a few different ways to do this; in a pot on the stove for hours, in a crockpot, or in a pressure cooker. The latter, obviously, is the fastest way, and in my opinion, gives the best result. Our pressure cooker was left behind in the States, so we´ve been using the crockpot, which works, but the texture of the beans isn´t quite as good. If you are going to just do them in a pot, you will want to soak the beans overnight. For all three versions, rinse the beans well, place them in your pot of choice, cover with enough water or stock for the beans to triple in volume, put the onion and epazote (if using) in the water and cook. Don´t salt the beans for this first step as it may make them tough.

On the stove in a regular pot, covered: Bring to a roiling boil, then lower the heat to a simmer. The beans will take anywhere between 2-4 hours to cook, depending on how fresh they were to begin with.

In a crockpot: Cook them on high for 4-5 hours or on low for 8-10 hours. This is a good way to do them overnight.

In a pressure cooker: Cook them under pressure for 35-45 minutes.

However you first cook your beans, you can taste them to see if they are done. Also, when you spoon out a couple and blow on them, the skin should split. Perfectly cooked beans should be soft but not mushy.

To finish the beans after they are cooked, thinly slice the other half of the onion. Heat the oil over medium heat in another pot large enough to hold the beans with water (a cazuela is perfect for this). Sautee the onions until they are beginning to soften and brown, about 5-7 minutes. If you want to use chiles, now is also the time to add them. Add about half a teaspoon of salt to the chiles and onion. Continue cooking and stirring as the onions brown (if a couple blacken, that´s ok. This is a dish where that is a nice flavor.). The chile will become very fragrant and blacken just slightly.

Here is the secret to a delicious finished bean broth. As your onions sautee (or before you start cooking them if you prefer to avoid multitasking in the kitchen), remove the other onion half and the epazote from the cooked beans. Remove the epazote leaves from the woody stem and discard the stem. Place the onion and the leaves in a blender with about a cup of the bean water and a half teaspoon of salt. Blend until smooth then add the mixture back to the beans. (Note: I have also been known to cook a dried chile with the beans and blend it up too. It´s nice and makes the final broth spicy.)

Once your sautéed onions and chile are ready, dump the beans and their water into the pot and stir to combine. Add another half teaspoon of salt and if you wish, now is a good time to add some stock. On its own, the bean broth will have a lot of flavor, but you can make it even richer with a nice homemade stock. It also depends on how watery you want them. Some people like a lot of broth. You need to have enough liquid for them to be covered, but beyond that, it´s your preference. Simmer this final mixture for at least 10 minutes and up to 30. The flavors will develop nicely. Taste and adjust seasonings as needed.

Your beans are now ready to be enjoyed as is, as a side, for enfrijoladas, or however you like them. The beans are best the first and second day, but are good in your fridge for up to a week. Once they´ve been refrigerated for a few days, then you can consider making refried beans. Refried beans are supposed to be made with older cooked beans. It´s a way to bring them back to life.

Refried beans: Heat 1-2 tablespoons of veggie oil in a pan over medium-high heat. Sautee a little onion (depends on how many beans you have left, you don´t want it to be too oniony) and a fresh, diced chile (jalapeño or Serrano). Add the beans to the pan with just some of their broth. Cook until hot, then start mashing them with a potato masher. Add more of the broth as they soak up the juice and until you get the consistency you want (again, personal preference dictates how liquidy you want your refried beans). Salt to taste, and you´re done. Takes about 10 or 15 minutes to make refried beans. Now they´ll be good in your fridge for another 3 or 4 days.

Go forth and make beans! Seriously.

Monday, April 11, 2011

Recipe: Salsa Verde

It´s time for some Mexican basics. This week and next, I want to share some simple, everyday Mexican recipes so that anyone who wants can start getting to know this wonderful and versatile cuisine for what it really is (hint: it´s a lot more than just tacos and burritos, and there´s not really any ground beef involved.) So here comes basic recipe #1, one of Maru´s favorites: Salsa Verde.

Go to any restaurant in this part of Mexico and you´ll usually get two little bowls of salsa, one green, one red. Depending on the establishment, the specifics of the salsa (the chiles used, roasted or not, etc.) will vary, but those are the colors. The green is made with a base of tomatillos, which look like little green tomatoes in a husk. Over the past few years, they have become readily available all over the US. I think even Glen´s in Grayling has them.

The recipe here is for a basic and versatile green salsa. It can be used just to dip, for enchiladas, chilaquiles, or whatever else you can think of. There is almost no chopping, and from start to finish, it will be done in about 20 minutes, super easy. It is great when it´s fresh, but making it a day ahead is also not a problem.

For a more rustic version, you can skip the blender or food processor and use a molcajete or large mortar and pestle to smash everything together.

Salsa Verde (makes about ½ liter of salsa, easily doubled) Vegan

1lb tomatillos (or ½ kilo)

¼ of a medium white onion

1-2 cloves of garlic still in their paper

1-3 serrano chiles (If you are worried about spiciness, you can also use a jalapeño, which is a little milder. This salsa is supposed to be on the spicier side, but make it how you want it!)

2/3 cup, chopped, loosely packed cilantro (including tender stems)

½ teaspoon salt or to taste

First, remove the papery husks from the tomatillos and rinse off the sticky coating they have.

There are two basic ways to begin this sauce, both are tasty, but the flavors will be different. The more traditional way is to place the tomatillos and chiles in a pot of water, bring them to a boil, and cook them for 3-5 minutes, until the tomatillos are soft. The onion and garlic should be roasted. Place them in a dry, non-stick pan over medium-high heat or on a regular pan coated with tin foil. Turn them so they roast and brown evenly.

The second way is to grill or broil the tomatillos, chiles, onion, and garlic. Whether on the grill or in the broiler, you want everything to blacken evenly. This method will give the sauce a smokier, deeper flavor. It´s my favorite version of the two.

However you cooked the tomatillos and chiles, now you just need to blend! If you want a milder salsa, remove the seeds from your chiles. Remove the garlic from it´s paper. If you grilled the tomatillos, you do not have to peel the blackened skin off. It´s a big part of the flavor. Place all the cooked veggies in a blender or food processor and blend until smooth. Add the salt and the cilantro and blend until everything is incorporated. Be careful of the blender top popping off if the salsa is hot!

Taste your salsa to see if it needs more cilantro or more salt. Remember that while the temperature of the salsa is hot, it will taste spicier. Once it cools down, the spiciness will mellow out. Sometimes, depending on the tomatillos, the finished product will be a little too acidic. You can add a teaspoon or two of sugar to offset the acid. Again, it will mellow with a little time.

The salsa is best used right away, but it will still be good in your fridge for about a week. Don´t worry if it is kind of like jelly after a day or two in the fridge. That´s just the tomatillos setting up. Once you reheat the salsa (in the microwave or on the stove), it will be back to a smooth consistency.

Enjoy! More recipes using this one to come soon...

Friday, April 8, 2011

Travels: Mérida, Yucatán Part V

Day 6: Celestún

Yucatán 2011 Day 6, Celestún

Mérida is almost literally at the center of the Yucatán, so everything is relatively close, including the beach. Although we had gotten a nice strong dose of waves and sand in Mazunte recently, we still wanted to head to the coast at least for a day, so we went west to the town of Celestún on the Gulf coast. It didn´t take us long to get there (and we had finally started to figure out a clean exit from the city) along the usual straight, flat Yucatán highways.

Celestún is located in a biological reserve that includes coastal waters, mangrove lagoons, and flamingo nesting and breeding hotspots. On our way into town, we pulled off to the side to investigate prices and details from the tours that they lead, but we were greeted by something that just felt off somehow, owing in no small part to the exorbitant price they wanted to charge. In the past, we have had mixed results at best with “eco-tours” and we didn´t feel like gambling this time around. Plus, it is just a real turn-off when there are a whole bunch of motorized boats cruising in and out of what is supposed to be a protected ecosystem. We decided to take a pass and just head to the beach.

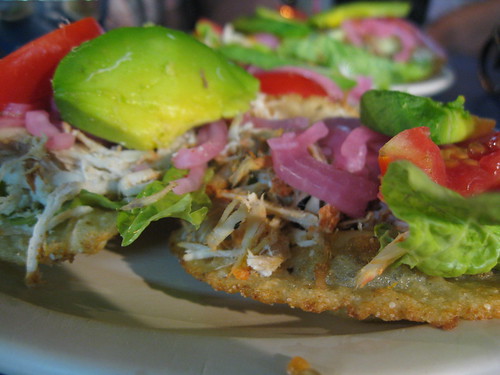
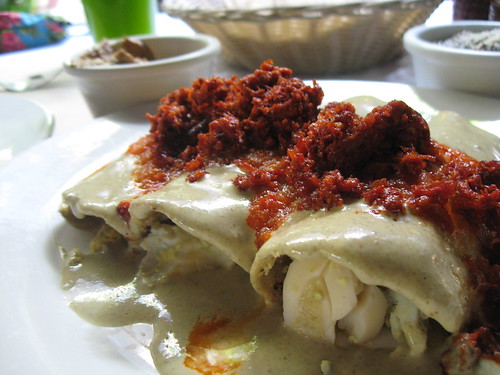
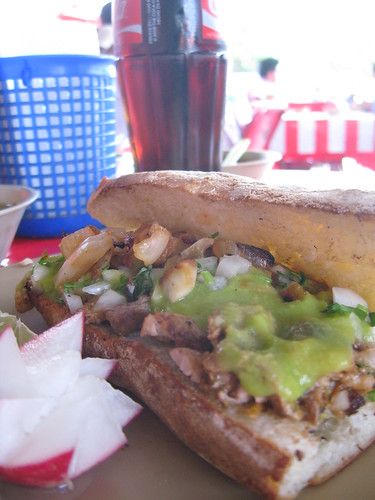
One of the first restaurants we spotted from the street looked good enough so we parked, walked down to the water and ordered some ceviche. When we first arrived, the water was calm, sapphire-green, and glassy. Almost the complete opposite of the raging waves we had grown accustomed to in Mazunte. Needless to say, we were looking forward to a swim later. While we waited patiently for our ceviche, we played a couple rounds of Settlers of Catan Travel Edition and Maru won, as usual, and then during our wait for food (which continued to grow), the wind started to pick up a bit, then it picked up a lot. Next thing we knew, the waves looked more like the waves in Mazunte, and we were actually chilly from the wind, so once our massive plate of ceviche arrived (we ordered the small), we carried it into the shelter of the inside of the restaurant to enjoy.

Yucatán 2011 Day 6, Celestún

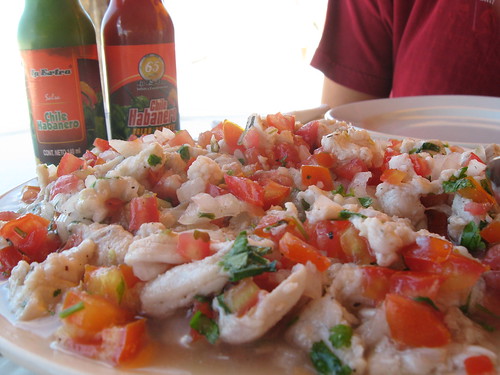
Our mountain of ceviche.

After stuffing ourselves silly with fish, we decided to try to get into the water on the still very windy beach, but we ended up just walking up and down a bit, then Maru found a really pretty set of pearls for sale. They had all sorts of colors, and they were cheap because they were not perfectly round pearls, and actually part of their charm is the different shapes. With new pearls and bellies full, we decided that Mother Nature had won the day and it was time to head back to home base in Mérida. We felt a little dejected because the whole thing was a bit of a bust, but our reward was waiting literally just around the bend.

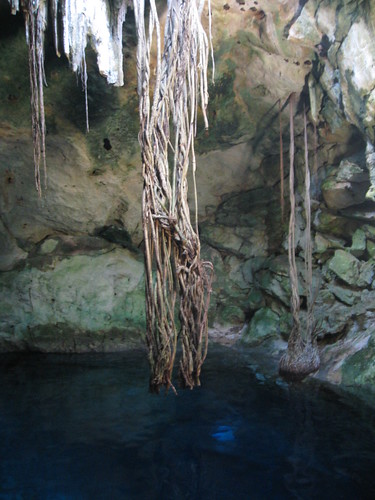
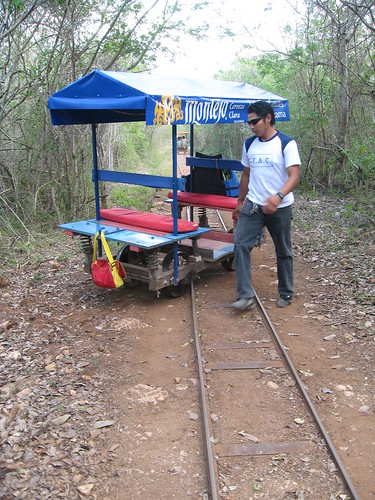
On the road out of town, a sign caught our eyes that offered tours of the lagoon in canoes, not in motorized boats. We thought, why not? Couldn´t be worse in price than the tours at the entrance. It turned out to be a highlight of our entire trip. For 2.5 hours we had a riverboat and a young, knowledgeable guide all to ourselves, and they even gave us each a really decent set of binoculars, all for less than the price of the other tour. (Sidenote: Maru and I have decided that we have to purchase a small pair of binoculars for our trips. There are so many instances when it would be great to have a pair.) Our guide, Christian, pointed out the different kinds of mangroves, horseshoe crabs (a first for Maru), enormous, tree-bound termite nests, different species of fish, and a staggering variety of water fowl. We spent a fair amount of time in a long mangrove tunnel where the water was shallow and calm and we could ask the 80 million questions we always have. Christian was young (17, I think), but he knew just about everything there was to know. Not only did he grow up nearby, but the cooperative that runs the tours intensively trains their guides.

Yucatán 2011 Day 6, Celestún

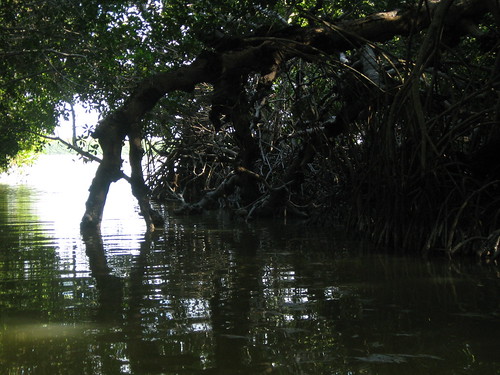
The mangrove tunnel.

The tour included a few short walks and even a ¼ mile bike ride at the end, so we got to enjoy the scenery from lots of different perspectives. In spite of Celestun´s flamingo fame though, we didn´t even see one. One “disadvantage” of the tour we chose is that it only stops at what they call the flamingo dormitory, which is where they roost for the night, but when we arrived we were too early. Oh, well. We had seen thousands of flamingos up close and personal near the Uyuni Salt Flats in Bolivia. But, we still had an interesting moment at the dormitory. While we were admiring the view and spying other types of birds, the wind from earlier in the day picked back up. We were at the end of a long dock in the middle of the lagoon, so the wind whipped around us, and out of nowhere, while I had my hands and concentration firmly focused on my binoculars, a gust picked my sunglasses up off my shirt where they were hanging and knocked them down. I lunged for them on the dock, but another little gust blew them into the water, and they sank.

Sidebar: I have a storied history with sunglasses. My Aunt Laurie has always gotten us nice glasses, and the last really nice pair she got me, I lost (or they were possibly stolen) several years ago in Xcaret. I bought myself another, not-so-nice-but-not-so-bad pair and left those on a bus to Mexico City, and then my brother gave me a nice pair of Oakley´s that I took to South America, where they broke and were duct taped for half the trip. Sigh. After our trip to the beach in Mazunte, I decided that I had to bite the bullet and buy myself a pair here in Mexico even though prices on things like that tend to be much higher here than in the States. My aunt is always talking about Maui Jim´s, and I found out that while they are a bit more expensive here, it wasn´t so much that it was worth the wait, so I slapped down the cash for a nice pair of glasses, promising myself to take care of them and enlisting Maru in helping me. They are great glasses, and the pair I bought is super light. It doesn´t feel like you even have anything on your face, and they do not resist strong gusts of wind in the middle of flamingo dormitories.

So you can imagine my dismay at watching my one-week-old pair of glasses go into the drink. Honestly, I am not one to get attached to stuff, but that was a hard one to take. I knew the lagoon was shallow, and I was about to jump in when Christian, our guide, calmly said, “No, I´ll go for the boat and get in.” I tried to protest, thinking there was no reason for him to get wet, but he insisted, walked down the dock to the boat, and paddled over to where the glasses were, then got out, and fished them out in about five seconds. Lucky day, especially considering that the water was so murky, you couldn´t see a quarter inch down. Oh, and for another reason too, but let me get to that.

Then—oh yes faithful readers, there is a “then”—I decided to pocket them for the time being, so I took the little bag they go in out of my pocket and was trying to position it to get the glasses into it, when the wind snatched the bag out of my hand and blew that into the water. Facepalm. I couldn’t have cared less about the dumb bag, but I also didn´t want to leave litter like that in a biological preserve so I reluctantly informed Christian, who was returning the boat to where it was, of what happened. He said he would try to grab it so that it didn´t float away, returned to the spot, and was fishing around with his arm when he casually informed us that there are hundreds of stingrays buried in the sand of the lagoon. In case you don´t know, stingrays are dangerous because they bury themselves in sand in shallow water, and when you step on them, they don´t like it, and they live up to their name. If I felt like an idiot for dropping something in the water twice, I felt even more so that this kid was fishing around and risking a potentially deadly sting for something worthless. I told him to please forget it, and then Maru also insisted that he return to the boat, which he did, chuckling all the while at a dumb American tourist. Again, facepalm.

Yucatán 2011 Day 6, Celestún

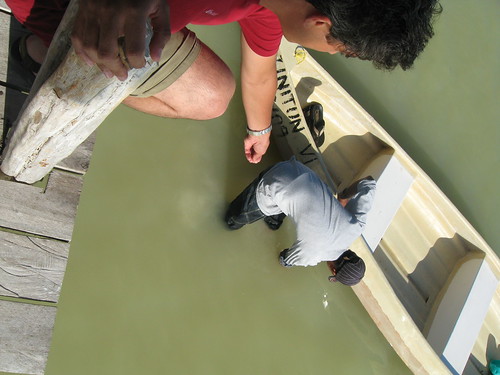
This was about 2 seconds before he mentioned the sting rays.

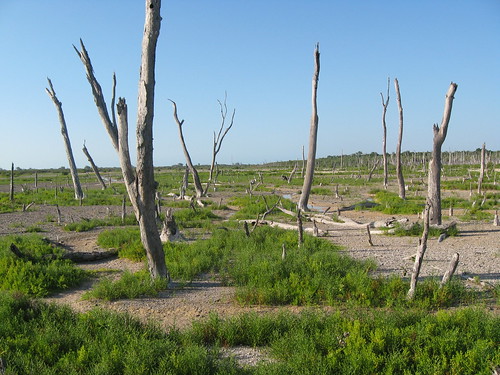
On the last leg of our journey back to where the tour started, Christian continued to tell stories about the stingrays around there. Apparently, they are so prevalent in the lagoons that the local fishermen get stung frequently. He even told us about his dad getting a bad sting once. Needless to say, I thanked him profusely for going in and for not letting me just jump in (That could have made for an interesting blog. I was about 2 seconds away from doing it.) He just smiled good-naturedly and moved on to tell us about the petrified forest we were then looking at. It was eerie, but gorgeous. All in all, no one was stung, my glasses were recovered, we learned a lot about the area, and saw lots of interesting flora and fauna. We were glad we skipped the first tour.

After we got back to Mérida, we found a little Italian place and ate some delicious pizza, then we called it a night.

Here are all of our Day 6 pics.

Day 7

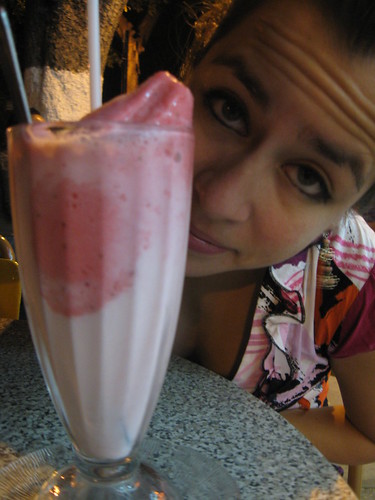
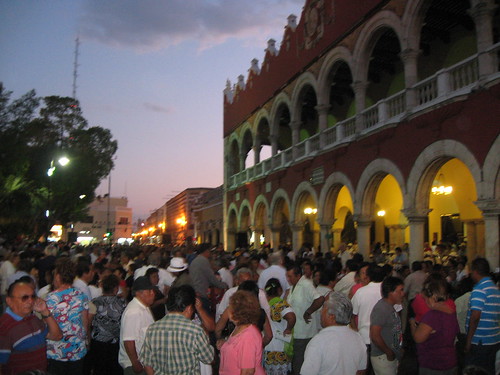
Our last full day in Mérida was Sunday, and Mérida on a Sunday is not to be missed. The streets around the main plaza are closed to traffic, people cruise around on bicycles, and hundreds of vendors fill the square with all sorts of things to sell; snacks, clothing, handicrafts, artwork, hats, knick-knacks, you name it. We ate breakfast then headed right downtown where we started things off with another marquesita. After our marquesita, we went on a free tour of the Casa de Montejo.

Yucatán 2011 Day 7, Mérida

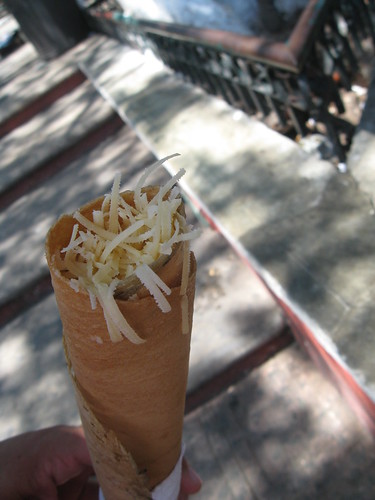
Marquesita with Edam cheese.

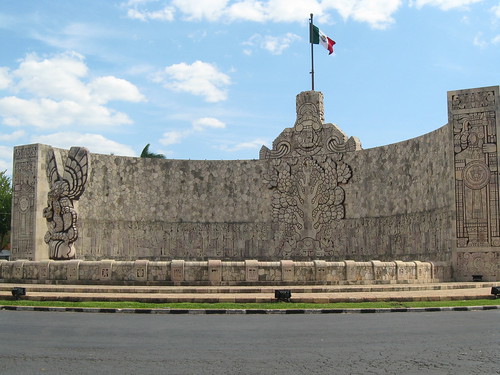
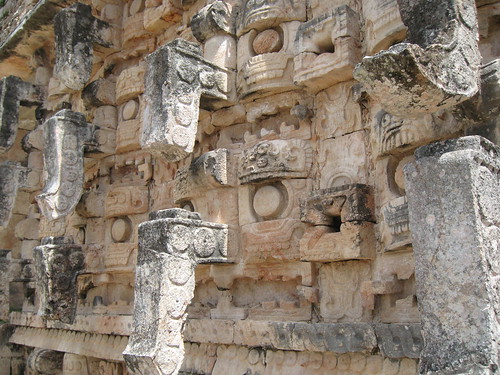
Montejo was the name of the principal conquistador of the Yucatán. His son and nephew also inherited his legacy. They were probably swell guys, I´m sure. What is now known as their house has an elaborate façade facing the main square, and the inside was remodeled at the end of the 19th century by the then owners. Banamex (a big bank here) bought the building and used it as offices for a while before turning it into a museum. It´s full of cool looking 19th century-rich-people-stuff. Eh. For someone interested in architecture from the period, it´s worth a look.

Now it was finally time for our visit to the market! We don´t consider a visit to any city in Latin America complete without a walk through the market, and we were really looking forward to Mérida´s. Turns out, it´s huge. Three stories, and it sprawls over what must be at least two city blocks. Unfortunately, most of the stalls were closed because it was Sunday, but we still got a good sense of everything, and I bought some things I wanted, mainly different concentrates of sauces (like moles) to make some Yucatecan goods at home.

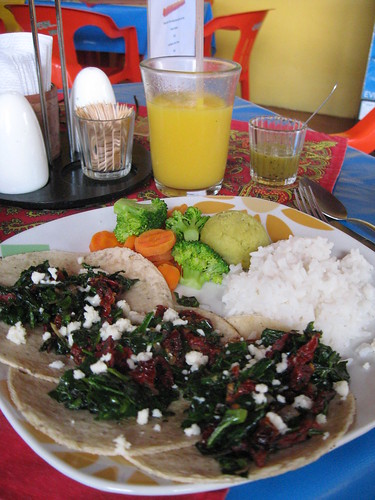
At that point we needed a snack, and we stumbled on a street of taco stands on one side of the market, sat down and ordered three rounds of different things to try: torta de carne asada, tacos de poc chuc, and tacos al pastor (Al pastor is really common in Puebla, but it´s a little different in Mérida.) All that and a coke: 36 pesos. I think both of our jaws dropped a little at how cheap that was.

Yucatán 2011 Day 7, Mérida

Torta de carne asada. That´s a sandwich!

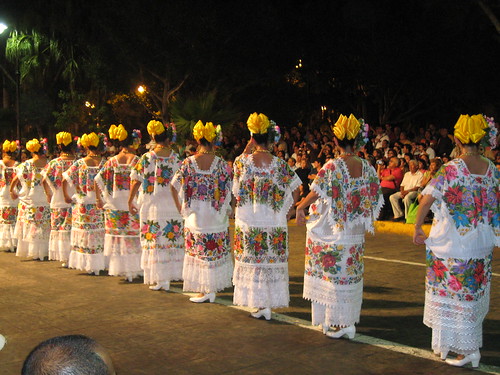
Back at the square, we bought ourselves little carved, wooden containers for salt and sugar, and then we found a gorgeous little guayabera (the white cotton shirts that are common in this part of the country) for our nephew, José Tobias. We bought it big because the kid is huge, and we can´t wait to see him in it! From there, it was time for a short rest and swim at the hotel, then we were back in the plaza for the Sunday night open-air dancing! It was great; live music, a cool breeze, and hundreds of happy couples. Maru was a little reluctant to join in because we were the youngest by easily 25 years, but it was worth it. After the first band played lots of Mexican golden oldies, a more modern band took the stage, and we hung out until we were hungry.

Yucatán 2011 Day 7, Mérida

Dancin´ in the streets!

In all our time eating out over the course of the week, we hadn´t gone out for a nice dinner, so this time we decided to splurge a little and ended up at a restaurant on the Paseo de Montejo called Slavia. It´s sort of an Asian fusion type place with kind of bizarre décor. We ordered a couple of glasses of wine, a Vietnamese spring roll and a seared tuna steak. Everything was cooked perfectly, and the tuna in particular was very yummy, but I found the meal to be pretty forgettable, especially for the price. Things have got to be top-notch to warrant a high price tag in a restaurant, and something about this just fell short (it didn´t help that a glass of wine was 90 pesos!). So we skipped getting dessert there, headed back to the square, got a rice pudding, and soaked up the Mérida night one last time.

Our last morning consisted of packing, going out for breakfast, buying a coconut ice cream cone (in a homemade cone!), turning in the rental car, and heading to the airport. We had a wonderful time in the Yucatán, and we will definitely be heading back there in the future.

Here is the link to our Day 7 pics.


Yucatán 2011 Day 7, Mérida
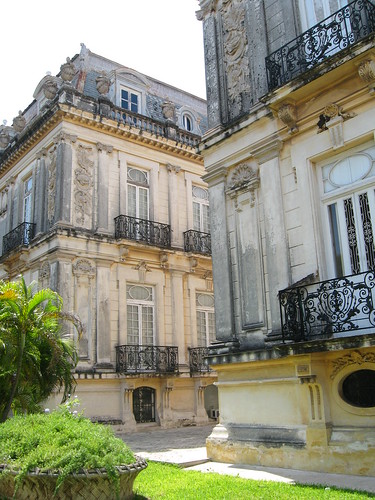
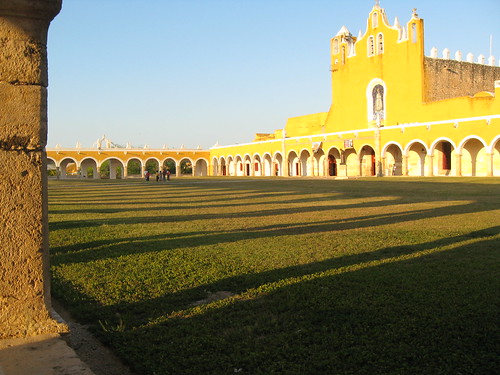
The white cathedral.

Thursday, April 7, 2011

Travels: Mérida, Yucatán Part IV

Yucatán 2011 Day 5, Mérida

Day 5: Mérida

After our very busy Thursday, we decided to stay in town Friday, so we ate our mediocre continental breakfast then headed to the famous Paseo de Montejo. The Paseo de Montejo is where many wealthy plantation owners and businessmen built their mansions during the height of the henequen trade, so there are some beautiful buildings. We started our walking tour of the strip at the Museum of Anthropology which is in one of these old mansions.

The museum was great, very well laid out, with well selected representations of pieces from the region’s archaeological sites and lots of interesting information presented in an accessible and easy to follow format. This information was nice to have after having seen all the sites we visited. I think it also could have been a good prelude to visiting the actual sites in order to provide context for the different types of structures and artwork.

There was also a fantastic temporary exhibit on the second floor of the museum which consisted of dozens of photographs from the Mexican Revolution divided into phases. The Mexican Revolution was a long, bloody, and at times chaotic struggle that almost never really had clearly established sides. It was fascinating to see common workers, farmers, and soldiers along with the famous figures captured in photos. I cannot imagine what it must have been like to live through such a tumultuous period.

Taking our leave of the museum, we headed to the Santa Ana Market for a snack and were immediately bombarded by the waiters of each stall trying to get us to sit at their tables. It’s always a little stressful when you don’t know which one to sit at and they are all so insistent. We finally chose one, and I ordered a dragonfruit water, which was delicious and refreshing, along with brazo de reina, which is a regional tamale made with eggs and chaya. Maru ordered cochinita pibil tacos. Everything was good, but the brazo de reina was definitely a misplaced order as it was a huge portion and really heavy for noon on a hot day. I couldn’t finish it, which left me a little upset, because I hate wasting food, but that was that.

With some calories in our stomachs, we walked up and down the Paseo, stopping in a couple of shops and admiring the buildings. From there we headed back towards our hotel looking for a place to eat a full meal, and we got lucky, finding a little restaurant with a delicious and light “menu del día” (they give you 3-4 courses for a low price) that consisted of salad, perfectly cooked fish served with pasta and squash, and a passion fruit mousse. It was just what we needed to offset the grease of our earlier snack.

Yucatán 2011 Day 5, Mérida

A monument at the end of Paseo de Montejo

Russ and Leanna, our new expat friends from the cenote trip, had invited us to their house for drinks that evening, so we rested for a bit in our room then headed out their way. Their house is a beautiful colonial a few blocks away from the main plaza in a really nice little neighborhood. They had a few other of their American expat friends over and we enjoyed a relaxing evening on their back patio which then progressed to the nearby loncheria for what I think were the best salbutes and panuchos we ate the entire trip, and we ended things with a nightcap with just Russ and Leanna back at their house.

Yucatán 2011 Day 5, Mérida

Panuchos. Handmade tortillas stuffed with beans, fried, then topped with goodies.

FYI, their place will be on House Hunters International in the near future. It was great to spend some time in someone’s house. The one downside of travelling is that you are constantly “out”, so you really appreciate the comforts of home, even if that home is someone else’s.


Yucatán 2011 Day 5, Mérida

New friends! And their dogs.

Wednesday, April 6, 2011

Travels: Mérida, Yucatán Part III

Day 4: Chichén Itzá and Izamal

Yucatán 2011 Day 4, Chichén Itzá

On our fourth day, we were destined for one of the new wonders of the world, Chichén Itzá. I had been with my family back in 2005, but surprisingly enough, Maru had never been there, and she needed to check it off her list. Before heading out, we knew that we would want a little more information than you can get from the seemingly random plaques placed around Mexican archaeological sites, and we don’t like to hire guides too often (you never know if you’re hiring someone who actually knows what they are talking about, and they can be restrictive), so we had purchased a little guide book with descriptions of all the major installments of the site.

We got there at about 9:15 in the morning, well before the crowds showed up, and we began our exploration. Seeing the ancient city in the light of our trip down the Puuc Route on Tuesday and with the guide book pointing out key elements of the different structures really helped us to appreciate what it is that makes this site so special. I understand that for some people out there, archaeological sites aren’t anything to write home about, but we both love visiting and learning the little that is known. There is always something to discover, even in a site previously visited. After all, these sites are all, quite literally, entire cities, and we like to dig into the nooks and crannies. Of course, we also appreciate the grandeur of famous buildings like the Castillo de Kukulcán (the really famous flagship image of the site), but where you garner an appreciation for the sheer workmanship is in the details, and oh, does Chichén have details.

Yucatán 2011 Day 4, Chichén Itzá

Everywhere you look, there are bas-relief carvings depicting everything from the ball game to creation to other legends and totems. And in a couple of places, the paint is still intact, and you can get an idea of what the murals originally looked like. We are total nerds and really get into speculating about what certain spots might have looked like or how they might have been used. Both Maru and I went through a want-to-be-an-archaeologist phase as kids. It is simply fascinating to contemplate cultures that are long gone but left such a lasting mark. While Mayan people still live and thrive along with their language and even some aspects of their cuisine, the specific culture that built these cities is really known to no one. In addition to the genocide of the conquistadors, there was a lot of fluctuation among the ancient civilizations themselves through trade, war, and even spiritual conversion. Later, in the anthropology museum, we learned that there is clear evidence that the Mayans ended up with products that had come from the southwestern US! That’s transregional trade on a level comparable to the Mediterranean, Indian Ocean, and the China Sea at the time.

Yucatán 2011 Day 4, Chichén Itzá

Maru posing like Chaac.

In total, we spent about 3 hours in the ruins of Chichén. Hunger and heat drove us out of the site. By the time we left, even more crowds had gathered. The place looked almost like Disney World with lines of international tourists. If you ever go, get there early.

Our next stop on the itinerary was the town of Izamal, but it was about an hour drive and we had some priorities. Being hot and hungry we wanted two things: a swim in a cenote and a snack! Priority one was the snack, and on our way through a little town called Libre Unión we saw a nice looking fruit stand. We ended up both eating a heaping plate of fruit that was prepared for us by a very nice woman while her equally nice husband offered us his chair in the shade and chatted with us about lots of different topics. He asked questions about our trip, we asked him questions about the area, he asked questions about Puebla and the US, we asked questions about his family, and he even tried to teach us how to count in Maya, but I think we were too sun-dazed to be very good students. When we asked him about a nearby cenote, he pointed us in the right direction, we paid for our fruit, exchanged well-wishes, and headed out.

While our snack necessities had been met with a pleasant and refreshing experience well beyond expectations, things then fell short due to a somewhat disappointing cenote encounter. It was just outside of town, down a dirt road, and the rock formations around it were beautiful, and the thing was abuzz (literally) with life, but there was a little too much pond scum and algae for either of us to take a dip. And, from the hollow on the other side came a buzzing echo of a hive of bees or hornets that sounded like something out of a horror movie about killer bees. Once we decided that the buzzing was getting louder, we decided to get back in our car and throw in the towel on our swim. We just cranked the AC to lower our core temps a bit.

Yucatán 2011 Day 4, Libre Unión

Yeah, that didn't look very refreshing.

Then we arrived in Izamal, an official Pueblo Mágico, and it lived up to its title. As soon as we pulled up to park along the square, an elderly local official waved us into a spot and then greeted us with one of the most cordial welcomes I have ever gotten from a stranger. He pointed out the major destinations, which are principally four pyramids and an enormous Franciscan monastery. For some reason, which we didn’t investigate, the entire town is painted in sunshine yellow. I know, it sounds nauseating, but it actually works. The place looks great, and they have obviously invested quite a bit in public works to fix facades and beautify the public spaces. But before indulging fully in Izamal’s beauty, we had to eat for real. The fruit was wearing off and we needed a meal.

I had read about a restaurant called Kinich (and Rick Bayless had tweeted from there), but I wasn’t sure if it was going to just be touristy and expensive or actually good. Thankfully, it was the latter, in spades. I can safely say it was hands down the best dining experience of our trip; pleasant atmosphere, great service (a serious rarity in Mexico), totally reasonable prices, and of course, the food. Wow. I got a Chaya water to drink and Maru got herself a well-deserved Coke, then our waitress brought us sikil pak and tortilla chips while we perused the enticing menu items. Sikil pak is a dip made from pumpkin seeds and seasonings, like the texture of guacamole. We started with a sopa de lima (even better than the one from the previous day) and rice with fried plantains, then we finally tried papadzules. They are tortillas filled with chopped hard-boiled egg on a bed of a sauce made from pumpkin seeds and epazote. Traditionally, they are topped with more egg and a tomato sauce, but the ones we ordered came topped with longaniza de Valladolid, a chorizo from another major town in Yucatán. One of the best things we ate on the entire trip. I about licked the plate clean. Then came our tzik, which is slow-roasted venison shredded and mixed with onion, radish, and cilantro. They gave us handmade tortillas to eat it on, and it was gone in a flash. For dessert, we shared a very nice little flan. Ahh, Kinich. We wanted to go back like three more times.

Yucatán 2011 Day 4, Izamal

Papadzules. Be jealous.

Fully satisfied, we began our exploration of Izamal, which was kicked off by, you guessed it, scaling another pyramid. The thing must have been huge originally, but like the pyramid in Cholula, it is mostly overgrown, so you have to imagine its scale. Once we were on top, you could see for miles in every direction, with a superb view of the town below. After climbing down, we walked to the monastery, which is purported to have the biggest church courtyard outside of the Vatican. It’s big.


Yucatán 2011 Day 4, Izamal

Speaking of the Vatican, good old John Paul II gave mass at this monastery in 1993. Apparently, it was a big deal. There’s a statue and a portion of the museum dedicated to his visit during which he gave their statue of the Virgin Mary a crown and pearl necklace.

Pope John Paul II was and is adored in Mexico as he visited the country numerous times. We were just upset because when we read the speech that he had given during the mass, he pretty much declared the landing of Christopher Columbus as a holy event ("when the cross crossed the ocean," or something to that effect) and blathered on about the church always supporting the indigenous communities through hard times. Um, are you referring to the hard times directly sanctioned and instigated by the institution you were basically the CEO of? I felt my tzik coming back up after reading that. Yes, John Paul, the cross came across the ocean, along with disease, inquisition, oppression, enslavement, and the overall systematic eradication of hundreds of indigenous cultures, i.e. genocide. I definitely recognize that the pyramids and archaeological sites we admire were also built on the backs of slaves, but I think that people forget too quickly that every colonial church in the Americas is a veritable monument to the genocidal founding of our nations. The sick irony of it is that Latin America is 70-80% Catholic. Conquest: win. Remembering of history: fail. Anyway, here we all are.

We stepped out of the church museum and enjoyed a beautiful sunset over the main square while a military band practiced on their bugles. I am pretty sure that the definition of quaint was being clearly illustrated for us. On our way back to Mérida, we were content, thoughtful, and tired.

Here is the link to all of our pics.

Yucatán 2011 Day 4, Izamal

Tuesday, April 5, 2011

Travels: Mérida, Yucatán Part II

Day 3: Cenotes

Yucatán 2011 Day 3, Cuzamá

As I said in my write-up of Day 2, there is a very particular geology in the Yucatán peninsula that has not allowed the formation of many inland lakes or rivers. Instead, there is a subterranean fresh water system that runs through the porous rock. Back in 2005, my family came down to Mexico and we stayed in Xcarét just south of Playa del Carmen on the Mayan Riviera, and one of our day trips was to an underground river (where I got mild hypothermia from assisting my dad in the chilly water, but that’s another story), and we also visited a couple of cenotes. Cenotes is a Spanished-up version of the Mayan word dzonot, and in English, I guess you would call them underground wells or maybe sinkholes. Growing up in Michigan, I’ve seen my fair share of beautiful lakes, ponds, and rivers, but nothing compares to a cenote. Some are open to the air and look like deep ponds, others are partially underground with large vents to the outside, and others are completely underground. The latter are like something out of a movie; an underground cave with shafts of light just barely illuminating sapphire blue water that is crystal clear all the way to the bottom, often more than 50 feet deep. They have their own ecosystems and are all a part of a vast network of underground rivers and tributaries that penetrate the entire peninsula. Due to the fact that they were the only ready source of fresh water other than rain, the Mayans considered them sacred. Their sheer beauty makes me inclined to agree.

Within driving distance of Mérida, there are literally hundreds of cenotes, some accessible, some not. We drove to a town called Cuzamá, which is purported to have 135 cenotes around it, to visit three main cenotes; Chelentún, Chansinic’ché, and Bolonchoojol. The tour consists of a horse-drawn cart that runs down narrow train tracks formally used to transport materials during the time of henequen production. (Henequen is a cactus that is used to make the material known as sisal, which during the industrial revolution and throughout the turn of the last century was a material in very high demand for the strong ropes it can make. Mérida became a very wealthy city because of the henequen trade. Well, that is to say, hacienda owners in Mérida were rolling in dough while people of indigenous descent broke their backs growing, harvesting, and processing the stuff.) For 200 pesos (about $16) four people get transported on one of these carts to visit each cenote for 30 minutes. It is a bone-jarring, three hour trip in total and worth every penny. Did I say it was bone-jarring? Hard to overemphasize that fact. If I close my eyes, I can still feel the rattle of the old cart on the even older tracks. Let’s just say it’s not a trip for anyone with back problems.

It was also hilarious that every time we came across another cart, which wasn´t too often due to the small number of tourists, our guide would say in his Yucatán drawl, "Hay que dar paso." Just that. Basically, "Gotta let ´em through." This simple statement would be followed by the even simpler act of us getting off of the cart and the two guides picking it up off of the tracks and setting it down out of the way. We´d wave at the passing guides and tourists, they´d pick up the cart, put it back on, and we were off. Got a smile out of the four of us every time.

Yucatán 2011 Day 3, Cuzamá

When we arrived, we saw an American couple packing up a bag from the back of their car, and we both figured that they would be our travel companions as there was literally no other tourist there. Maru and I weren’t sure what type of gringo tourist these two were going to be, but as soon as I said “Good morning” to the man, Russ, he threw me a big smile, and I had a good feeling, which was not at all unfounded. Russ and his wife Leanna are a retired couple from San Francisco who moved to Mérida last spring. They proved to be the perfect travel companions. We ended up eating with them afterwards and even going to their house for some drinks while we were in town.

The first cenote was gorgeous with lots of fish to look at and a long stretch to swim in. As soon as we arrived, the other tourists who were there were leaving, so we had it to ourselves for the majority of the time. Our guide ended up taking us to what is normally the last stop as our second stop to take advantage of the sun since it was partially cloudy. Once we got there, we understood what he was talking about. This cenote is completely underground. You have to descend a ladder down a hole to get to it, which is a little scary, but once you’re there you realize you would have gone down a ladder twice as long to see something so unique and captivating. About halfway through our time in this cenote, some very loud tourists came in, so we were quickly encouraged to go, which ended up being perfect for the last cenote of the day, because the four of us were completely by ourselves for virtually the entire time. Russ and I worked on our dives, and we all just enjoyed the peace, quiet, and beauty of the place.

Yucatán 2011 Day 3, Cuzamá

Reluctantly, we packed up and left the last cenote and boarded our cart for thirty minutes of shaking and jarring to get back to base where we all had a beer in the parking lot and chatted for a bit. We decided to keep the conversation going at lunch, so we got a tip on where to go from the guides and headed to the town of Acanceh to eat at a large restaurant for tourists that ended up being really good. Everyone got a free sopa de lima when we showed them the promotional flyer we brought with us, then Maru ordered pavo en relleno negro and the rest of us ordered queso relleno, all served quickly, good sized portions, and very tasty. The company was great too!

By the time we got back into town, it was getting dark. We bathed and got changed then went out for some yummy sorbet on the Paseo de Montejo and went to bed early to rest up for another long day.

Here are links to our pics from that day.

Yucatán 2011 Day 3, Mérida

Monday, April 4, 2011

Travels: Mérida, Yucatán Part I

Mérida 2011 Day 1

For a long time, Maru and I have wanted to visit Mérida, the capital of the state of Yucatán. We always heard nothing but great things about the city and we knew that the surrounding area was full of sights to see: infamous archaeological sites, beaches, biological reserves, incredible colonial architecture, cenotes (deep, clear sink holes), friendly people, and wonderful regional food. It is also a very different place from central and southern Mexico. Food changes, accents change, even some customs change, sort of like the difference between north and south in the US.

So, with time on our hands, we found a good package deal on a flight and hotel and took off for a week. We were not disappointed. Mérida and the Yucatán met and surpassed all of our expectations. Our days were long and full, we clocked about 900 kilometers on the rental car, and there´s even more we could have done. Here´s a small peek into our week.

Day 1

Our plane landed at about 1:30 pm, and we picked up our rental car (a very basic compact Chevy) and headed to our hotel, Casa de las Columnas. It´s in a renovated colonial building with beautiful tiles and high ceilings on the ground floor about 9 blocks from the Plaza Grande in downtown Mérida, about a 15 minute walk. Our room was spacious and clean, and we had hot water and great water pressure. Can’t ask for much more from a basic hotel room.

After settling in, we took a walk downtown in search of our first meal, sticking to the shade to avoid the intense Yucatán sun. The restaurant we decided to stop at, La Blanca Mérida, was ok. They gave us a nice little coleslaw followed by a yummy lentil soup, but then the main course took a bit of a dive as things were lukewarm rather than hot and not so fresh. What made matters worse was that Maru got eaten alive by mosquitoes, inside the air conditioned restaurant! All in all, not our best dining experience, but we were unperturbed.

We made it to the plaza, got to know the twin seats that are all over this part of the country (set up like that love toilet from an old SNL commercial spoof), walked through the Palacio Municipal, which had some really cool murals, took a look at the cathedral (a lot more stark than the elaborate one in Puebla), and got some very helpful information from a man in the tourism office. By that point, the heat had done us in for the afternoon, so we headed back to our room and rested for a bit.

We finished the day by heading back to the plaza in the evening. Mérida is full of free, public events, and every Monday night, there is a regional folk dance demonstration with a live band. As avid fans of Mexican folk dances, Maru and I have both seen quite a few folk dance groups, but this one was in a league of its own. The dancers made the whole thing look effortless and joyful (even when they were dancing with trays on their heads loaded with drinks) and the choreography was incredible. They danced for a solid hour, and then we went in search of a snack and almost immediately found our first marquesita cart. A marquesita is most easily compared to a crepe, but the way it is cooked is very different, and when it is served to you, it is very crispy, almost like a thin waffle cone. Fillings are edam cheese, nutella, cajeta, lechera or some kind of combination. I loved it with the cheese. Yummy. This marquesita would prove to be the first of about five that we ate at other points throughout the week.

Mérida 2011 Day 1

Day 2: RutaPuuc and Uxmal

Between about 500 and 1400 CE, the Mayans built and expanded like crazy, and in spite of systematic cultural genocide, which included the destruction of their temples and pilfering of their cities to build churches, many Mayan buildings and sites survive to this day and have been restored for visitors by the federal and state government. We spent our second day soaking in a small but impressive sampling of this ancient history along what is known as the Puuc Route, Puuc being a particular style of construction from the period.

Originally, we had intended to start the Puuc Route in the Lol-tún caves, but you have to enter the caves with a guide and on a particular schedule, and we got a little turned around in the town of Ticul, so we lost our window of opportunity. Oh, well. It was a very miniscule damper on an otherwise amazing day.

The route consists of four minor sites and the major site of Uxmal, which rivals (and, depending on who you ask, surpasses) Chichén Itzá in size and extension. Our first stop was Labná, which gave us an introduction to these very particularly Mayan archways that we would continue to see at other sites. Next up was Xlapak, which is a site that isn’t really excavated yet, so they don’t even charge you to get in. Here, it was interesting to see more or less what these sites looked like before archaeologists took on the monumental task of cleaning and restoring the buildings. Due to time constraints, we had to skip the site known as Sayil, and we headed straight for Kabah.

Yucatán 2011 Day 2, Labná

You never really know what to expect when you go to an ancient archaeological site, as the pictures and descriptions often don’t do the site justice. Kabah was a case in point. At the entrance, there was a map of the site, and at first I thought it would take us hours to see everything, but the man selling tickets told us that only a small percentage is excavated. Fully excavated, the place would certainly be as impressive as any major archaeological site in the world. Just the little bit we saw was a sight to behold. Most of the grandeur is blocked from view by the layout, but as soon as you climb the first steps you are greeted by a massive wall of intricate carvings known as masks of Chaac, a principal deity of the Mayan religion, a type of rain or water god. The Yucatán is dry and hot, and due to its geological structures, there are almost no inland rivers or lakes. Instead, there are cenotes, or large, underground wells of fresh water, but the cenotes couldn’t meet all of the needs of cities full of people a thousand years ago, so they developed sophisticated ways to collect rain and devoted a lot of time and energy to worshipping the god in charge of water to keep in good standing. You know.

Yucatán 2011 Day 2, Kabah

After Kabah, we needed to eat and we found a nice restaurant right off the main road called the Pickled Onion, just like that, in English. The owner is British, I think. The food wasn’t exactly cheap, but it was fresh and delicious. Maru had pollo pibil and I had chaya (sort of like spinach) and sundried tomato tacos. For “dessert” we made use of the pool attached to the restaurant, which was perfect to cool us off and get us ready for Uxmal.

Yucatán 2011 Day 2, Puuc Route

Uxmal is incredible. We arrived at 3pm and stayed until they closed at 5pm and didn’t really have enough time to even see everything. The main pyramid itself is one of the most impressive structures I have ever seen, but there’s a whole lot more, too. Spending time at other, smaller sites earlier in the day proved to be helpful in knowing what to look for and recognizing architectural patterns in Uxmal’s buildings. Once again, Chaac was everywhere, as well as symbols of jaguars, fish, birds, turtles, iguanas, and armadillos. The details were astounding. We decided that one of these days we need an actual archaeologist to give us a tour of one of these places.

Yucatán 2011 Day 2, Uxmal

Apart from the buildings, the sites along the Puuc Route also offered small glimpses into the local natural environment. We heard and saw many different birds, and there is a species of iguana that is everywhere. In Uxmal, we actually witnessed a pair of iguanas mating! Crazy.

Once 5pm hit, we had to leave the site, but we just stepped outside for a beer as we were headed back in for the light and sound show at 7pm. We had no idea what to expect, but the price was included in the general admission, so we figured it was worth a shot. All I ever think of when I hear “light and sound show” is the laser light shows in Disney World that my dad always loved and I always thought were kind of meh. For the record, the light and sound show at Uxmal is worth it just to get the chance to enter an archaeological site at night. The place has a whole different feeling to it. As far as the actual show, the lights and music were very well designed. Everyone sat on chairs in one of the main buildings and you could see the two pyramids and the palace building, which would be lit up in different colors and patterns throughout the show. The colors and orchestration were great. The narration, on the other hand, was cheesier even then anything I’ve seen at Disney. It included “reenactments” of Mayan legends that reminded me of the historical reenactments you sometimes see in documentaries—stilted voices and absurd dialogue. Whatever, the visuals were cool.

Back in Mérida in the evening, we were hungry, so we headed to the Parque Santiago for some panuchos, salbutes, and a tamal colado, all delicious, and to top it all off, we got to see a live band and about a hundred couples dancing out in the open air, another one of Mérida’s regular, free public events. Needless to say, we got back to our room and crashed hard. That was a long day. Day 3 will be posted tomorrow!

Here is a link to our pics from Day 1, and here for Day 2.

Yucatán 2011 Day 2, Uxmal

Saturday, April 2, 2011

Recipe: Mole Poblano

Finished mole

During our trip to Oaxaca last year, I fell in love with Oaxacan black mole. We purchased the unique dried chiles from that region that give it such a distinctive flavor. They are called chihuacles, and it wasn´t until we got back that I discovered how truly particular they are to the region and hard to find elsewhere. Had I known, I would have stocked up. They have an incredible aroma. Anyway, I took advantage of having procured them and dug into the Rick Bayless recipe for mole negro . The final product was a smashing success. I didn´t quite get the dark black color, but the flavor was indisputable. Then, I decided that I had to do some justice to Puebla and make mole poblano the next time I was up to it. Plus, mole poblano usually has peanuts in it, so I can´t eat it without getting a little sick due to allergies. My version eliminates the culprit!

So recently, in honor of celebrating and thanking the team I worked with as director of the high school in Colegio Ypsilanti, I set out to make mole poblano. I have a great cookbook from Willams Sonoma called Savoring Mexico with very reliable, authentic recipes. The only mole recipe in there, however, is from Querétaro, a state north of Mexico City. It is very similar to mole poblano, but there are some slight differences, so I conferenced with Maru´s grandma and confirmed the ingredients and some of the steps. At the end of the whole process, my mole still needs to be perfected, but we couldn´t argue with the yummy results.

Here I have posted the recipe as I did it. Mole is a little daunting to make (and eat for some people!), but if you have some experience in the kitchen and are comfortable with a recipe that involves lots of steps, you can definitely do it. As far as ingredients go, the one thing you´ll really have to hunt for in the states are the dried chiles. Here, the markets have them in huge mountains. I think we spent like 30 pesos for all of the chiles in the recipe. They only come in little bags in the US and are more expensive, but it´s worth it. The recipe yields a huge pot of sauce, so you´ll have leftovers that you can easily give away or freeze for up to several months. Definitely make the mole a day or two in advance so that you get the hard work out of the way, and you also give the flavors time to develop.

If you are going to do this recipe, make sure you have a few hours to work with, and a friend or two to help in key parts isn´t a bad idea either! Cleaning the chiles is time consuming, and processing everything in the blender or with a stick blender can be quite the juggling act. Read the recipe a few times and make sure you have everything you need on hand. And let me know if you follow this recipe. I would really like to know how it turned out!

Mole “Poblano”

The Ingredients:

  • 1 whole chicken cut into eight parts for serving (2 legs, 2 thighs, and the breast in four pieces, all still on the bone). The back, neck, head, wings, and feet should also be used for the stock, see next ingredient.
  • 6-8 cups homemade chicken stock. If you are going to make mole, do not do yourself the disservice of using canned stock or bouillon. Make it!
  • Place all of the extra chicken parts in a large pot with 1 onion quartered, 5 whole cloves of garlic, 2 medium carrots cut in half, two bay leaves, and about 1t salt. Cover with cold water, bring to a simmer, and cook, partially covered for at least 1 hour and up to 2. Skim off the foam and fat as it rises to the surface. Do not stir and do not boil. After the cook time, pour the stock through a mesh strainer and discard the bones and veggies. Skim excess fat off the top of the stock and set aside.
  • 12 ancho chiles
  • 12 pasilla chiles
  • 12 mulatto chiles (there should be an equal amount of each chile. If you have a scale, you can weigh them as sometimes the size can vary quite a bit.)
  • ½ cup plus 2 Tablespoons sesame seeds
  • ½ cup fresh, flavorful lard (if you can get fresh lard from a butcher, this is the recipe to do it for. Lard has a bad reputation that it doesn´t entirely deserve and the flavor really adds to the richness of the mole. If you can´t get lard or just don´t want to use it, vegetable oil is fine.)
  • ½ lb tomatillos, husked, rinsed, and quartered
  • 1 medium white onion, chopped
  • 2 cloves garlic, minced
  • ½ teaspoons aniseeds
  • ¼ teaspoons ground cumin
  • 1 bay leaf
  • 1 day-old corn tortilla
  • 1 chunk or slice of day old white bread (baguette or Italian loaf is good)
  • 40 raw almonds
  • 4 T raisins
  • ½ inch piece of true cinnamon (not cassia, which is the Asian stuff)
  • 3 whole cloves
  • 1 disk Mexican chocolate, about 1.5 oz (You can find brand name stuff - Abuelita, Ibarra - in most US grocery stores. They are ok, but full of artificial flavors. I would also recommend just using some good, bittersweet chocolate. If you do that, just add a little more sugar. Mexican chocolate is mixed with sugar and a little cinnamon.)
  • 2 Tablespoons sugar
  • 2 teaspoons salt or to taste

Ingredients assembled

The Process:

  1. Clean the chiles: Remove the stems, open, and devein the chiles. Remove all of the seeds and set them aside. Try to keep the chiles in large pieces so they are more manageable. If you don´t handle chiles often, you should wear gloves.
  2. Put 1 ½ Tablespoons of the seeds of each chile type into a heavy-bottomed skillet over medium high heat. Toast until golden brown then pour into a dish.
  3. Toast the sesame seeds in the same pan until golden brown. Set aside 3 Tablespoons of the sesame seeds for garnish later and add the rest to the chile seeds.
  4. In a large frying pan, heat up about 2 Tablespoons of the lard over medium high heat. Add the tomatillos and onion and cook until nicely browned, about 10-15 minutes. Add the garlic and cook for a few more minutes then stir in the bay leaf, cumin, and aniseed. Transfer to a blender and process into a smooth puree (I used a stick blender for everything, which in some ways was easier. There´s lots of blending in this recipe).
  5. Wipe out the pan and add another 2-3 Tablespoons of the lard and heat until hot and shimmering. Line a baking sheet with absorbent paper. Fry the following ingredients placing them to drain on the paper: Tortilla: just a few seconds on each side. Bread: until golden all around. Almonds: just a few seconds. Raisins: just until they puff up. Cinnamon bark and cloves: just a few seconds.
  6. Add these fried ingredients along with 1 cup of your stock to the tomatillo puree and process into a thick paste.
  7. Add the remaining lard to the same pan and again, heat to shimmering. Fry the chiles, a few at a time, tossing constantly, until they blister. If your fat is hot enough, this should only take about 10-20 seconds. As you finish, transfer them to the paper to drain. If you accidentally burned any of them, discard them as they will make the mole too bitter.
  8. Place the chiles in a large bowl, add hot water to cover and soak for 30 minutes. Stir them every 10 minutes or so to ensure even soaking.
  9. Place the sesame seeds and chile seeds you toasted and set aside earlier and process them in a spice grinder. Add them to the tomatillo paste. If you don´t have a spice grinder, they can just go right in with the nuts and raisins. The spice grinder helps make things more uniform.
  10. Drain the chiles. Add them to the blender with about 1 cup of your stock and process into a smooth puree.
  11. Pour about 1 Tablespoon of the fat into a large, heavy-bottomed pot or Mexican cazuela. Heat over medium-high. Add the complete tomatillo puree and fry, stirring constantly, for about 3 minutes. Add the chile puree and continue cooking and stirring for another 3 minutes.
  12. Break the chocolate into chunks and add it to the mixture along with the sugar and salt. Stir until melted and dissolved.
  13. Add more of your stock about 1 cup at a time, until you reach the desired consistency. It should be a thick sauce, like thin gravy.
  14. Taste and adjust the seasoning. It´s possible you may need to add more sugar if it´s a little too bitter or more chocolate.
  15. Simmer for 30-40 minutes for the flavors to come together.
  16. In batches in a blender or with your stick blender, process the entire mixture one more time.
  17. Pour the sauce through a medium-mesh strainer to remove any little bits of skin or pieces of seeds or nuts that didn´t blend enough. The sauce should now be smooth as silk.
This is everything you should do the day ahead. Let your mole cool, then refrigerate until the next day.

Finishing the Dish:

  1. Reheat the mole to simmering.
  2. Taste and adjust the seasonings one last time.
  3. Add the four pieces of dark meat and set a timer for 15 minutes.
  4. Add the breast quarters and cook all of the chicken in the simmering mole for another 20-25 minutes until the meat is done and tender.
  5. To serve, place one piece of chicken in the center of the plate, pour about a cup of sauce over the top of it, and sprinkle with reserved toasted sesame seeds. Typical sides are red Mexican rice and fresh corn tortillas. Enjoy!

You´ll have leftovers, which is great considering the amount of work that went into this sauce. The mole will keep in the fridge for about a week and in the freezer for several months. You can make enmoladas with it (basically enchiladas with mole), thin it out into a salad dressing, serve it over fish or shrimp, or one of my personal favorites, mole pie. Mole pie is basically a casserole. Shred cooked chicken, pour mole over it, and put it into a baking dish and top with a pie pastry. Bake until the pastry is golden brown and you´re done! Makes a hearty meal.

I hope that you give this sauce a try sometime. The taste isn´t for every palate, but for those of us who do appreciate it, it is some of the best stuff on the planet. I will definitely be making more in the future as I feel the need to perfect the balance of flavors and textures.

Stay tuned as next week I´ll be posting the recap of our week in Mérida!